

Behavioral Cloning Project
The goals / steps of this project are the following:
My project includes the following files:
Using the Udacity provided simulator and my drive.py file, the car can be driven autonomously around the track by executing
python drive.py model.h5
The model.py file contains the code for training and saving the convolution neural network. The file shows the pipeline I used for training and validating the model, and it contains comments to explain how the code works.
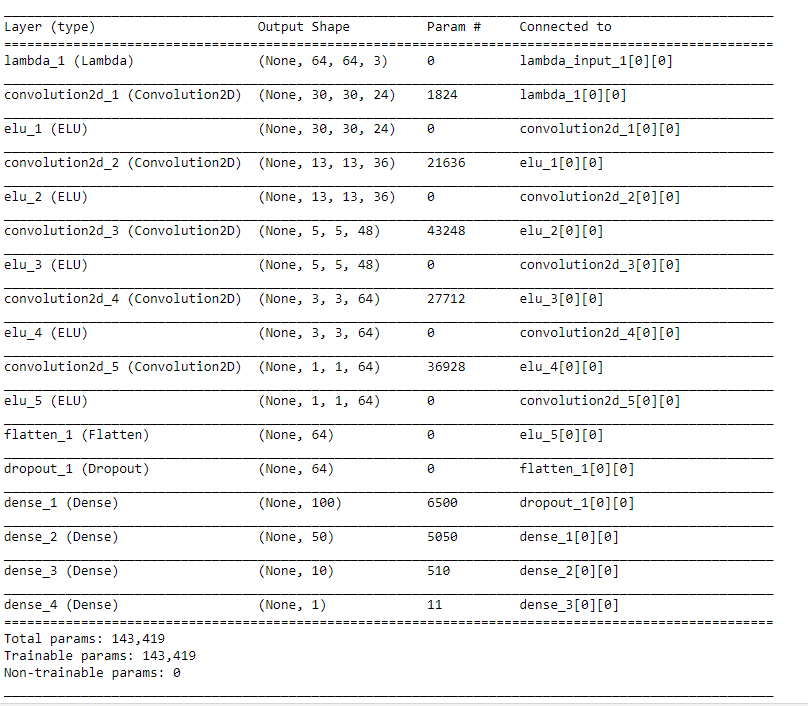
Nvidia neural network is used. It consists of a convolution neural network with 5x5 and 3x3 filter and depths between 24 and 64 (model.py lines 183-200)
The model includes ELU layers to introduce nonlinearity and better convergence due to implicit batch-norm (code lines 183-200), and the data is normalized in the model using a Keras lambda layer (code line 184).
The model contains dropout layers in order to reduce overfitting and time complexity (model.py lines 196) and l2 regulation in both convolutional and fully connected layers except last two fully connected layers(code lines 185-198).
The input image is resized to 64x64 in order to reduce the complexity of model, at the same it faster the training turnover.
The model was trained and validated on different data sets to ensure that the model was not overfitting (code lines 155-157). The model was tested by running it through the simulator and ensuring that the vehicle could stay on the track.
The model used
Training data was chosen to keep the vehicle driving on the road. The data used are udacity data and one regular and one revese lap on track 2 from all three cameras. Beside those, data augmentation is heavily used. Images are randomly applied flipping, shearring and brightening.
For details about how I created the training data, see the next section.
My first step was to use a convolution neural network model similar to the Nvidia end-to-end neural network. I thought this model might be appropriate because it is not too complex for the problem.
In order to gauge how well the model was working, I split my image and steering angle data into a training and validation set. However, I found validation loss is consistantly less than training loss which is quiet against the intuition. At the same, a model with less lower loss doesn’t necessarily mean it drives better around the track.
At first I thought the model probably overfitting, I add a dropout layer after the flatten layer and l2 regulation to convoluntional layers and fully connected layers. It did show some improvement, but it still could not do well in cury road, especially the turn right after the bridge. It seems the data wasn’t able to train the model to deal with cury road. Like most people did, I change my main task to getting more approriate data.
What’s more, I use model checkpoint in keras to save model in every eporch since validation loss isn’t a good indicator for a model goodness.
During the process of getting approriate data, I have tried to collect data by myself, which turned out it’s an endless game. Most of them it’s gabbage in and gabbage out. After a few weeks work, I decided to generate data with intensively using data augmentation and suppressed the number of training data which has abs(steering) less than 0.1 generate from the generator.
At the end of the process, the vehicle is able to drive autonomously around the track one without leaving the road, but it still could not finish the track two without leaving the road. It got confused when there are two road paralleling with each other, and could not recognized the blockage in track two. Despite my bad experience of collecting data by myself, I ended up with reluntantly collect two lap data for the track two after I attempted to augmentate the helpful data with shawdowing and vertical translating.
Here is a visualization of the architecture (note: visualizing the architecture is optional according to the project rubric)
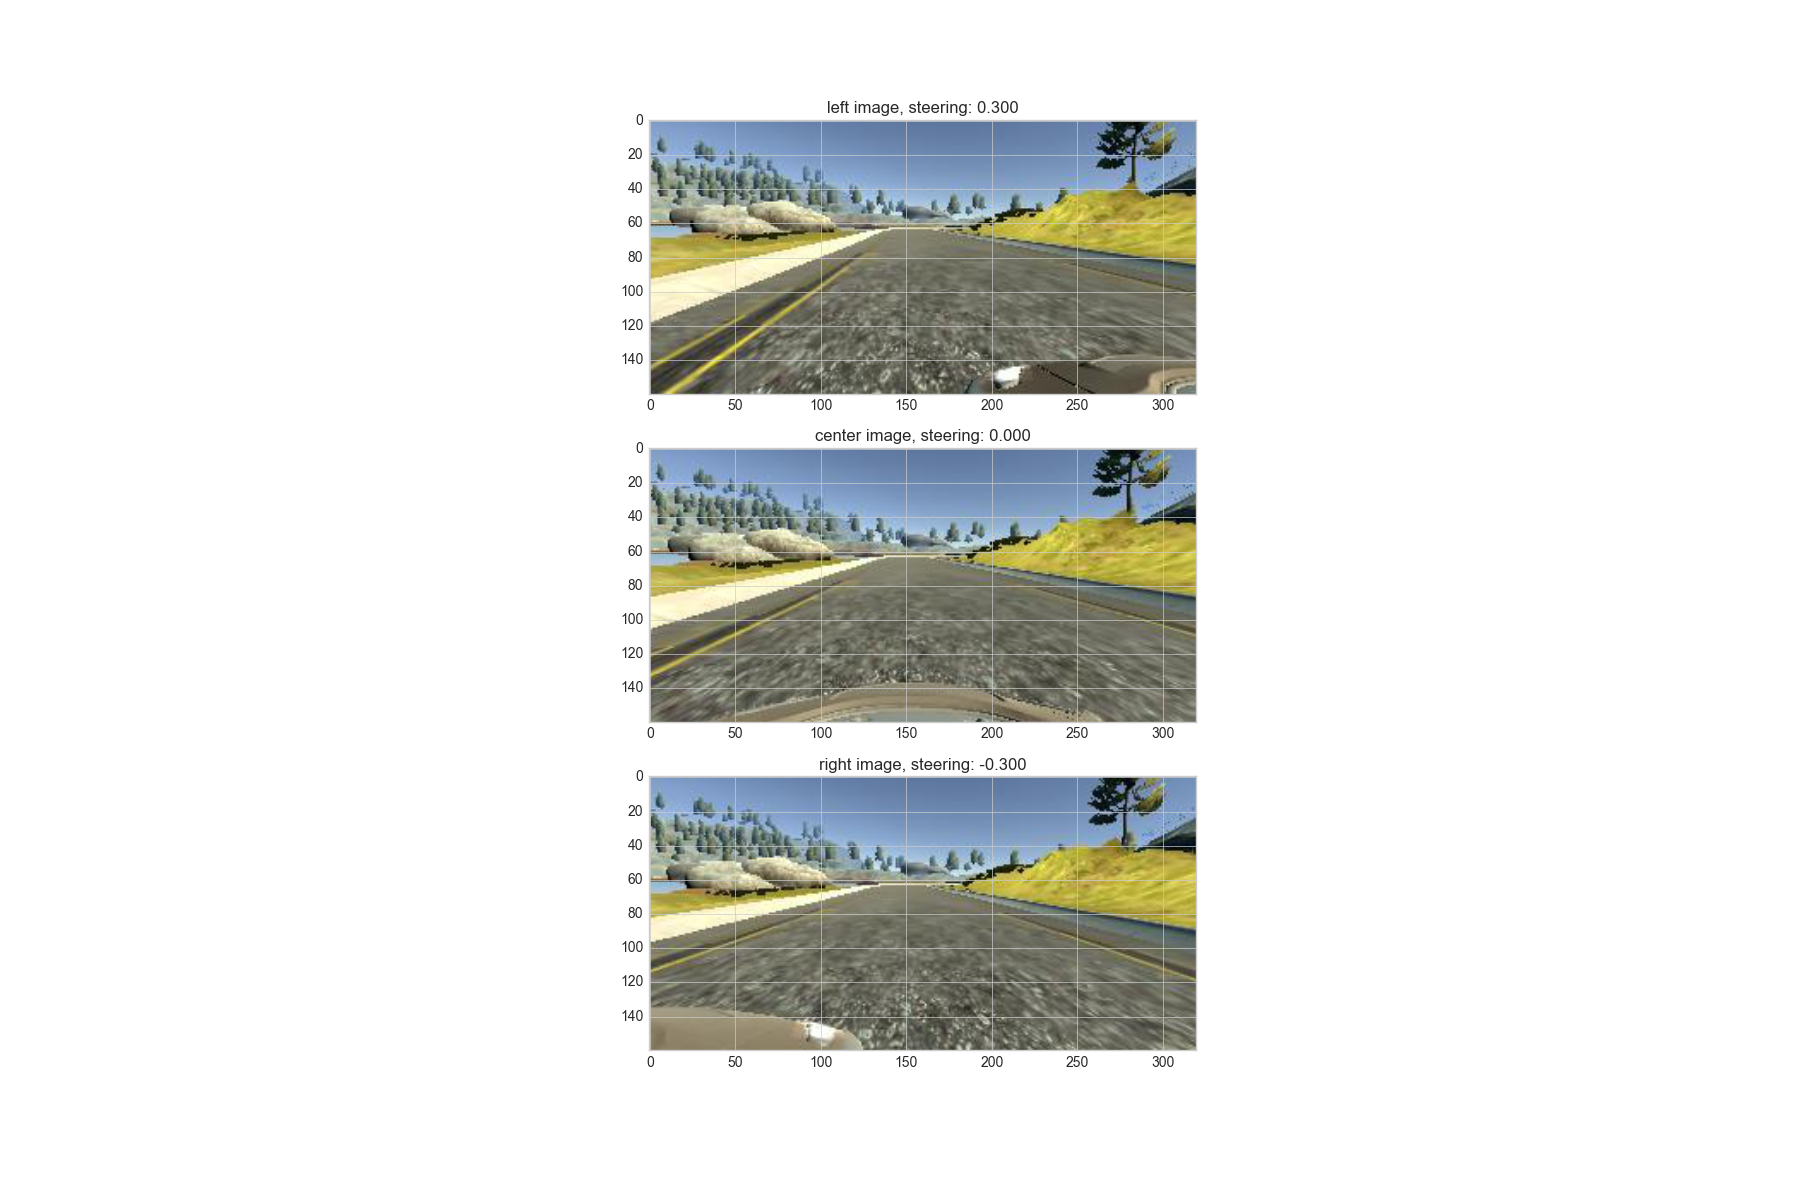
To get more approriate data I first use multiple cameras and add corresponding steering adjustment:
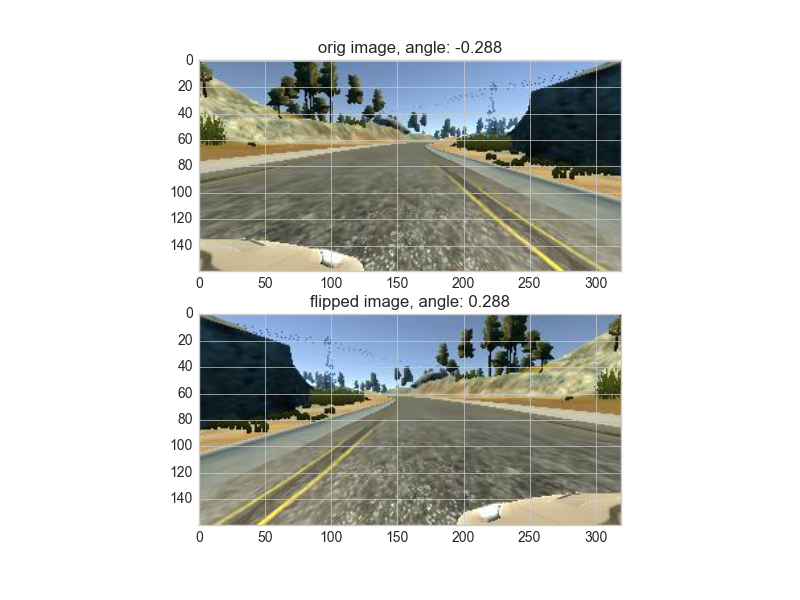
To augment the data sat, I also flipped images and angles thinking that this would give more data point with bigger steering and symmetrize the distribution of steering angle. For example, here is an image that has then been flipped:
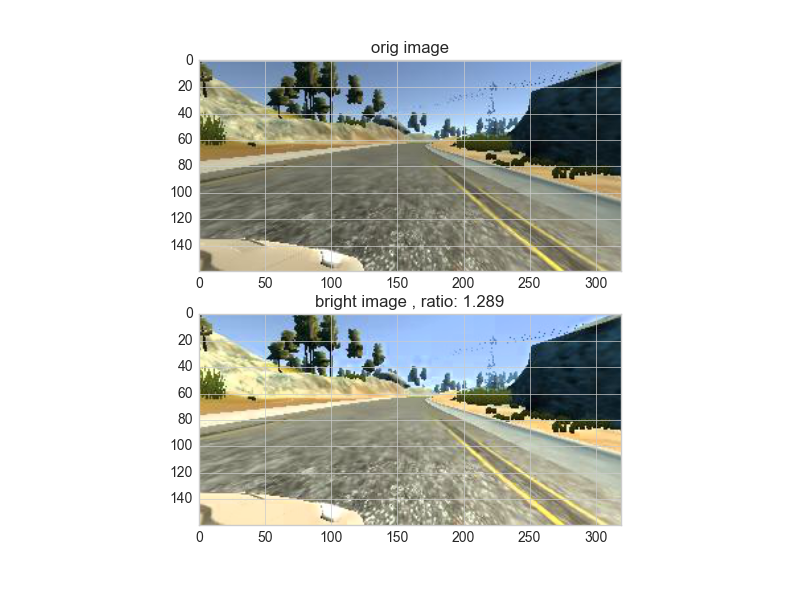
Then I randomly brighten the image thinking that color of track two is lighter than track one. Randomly brightness may help us with training more generalized model. here is an image that has then been randomly brightened:
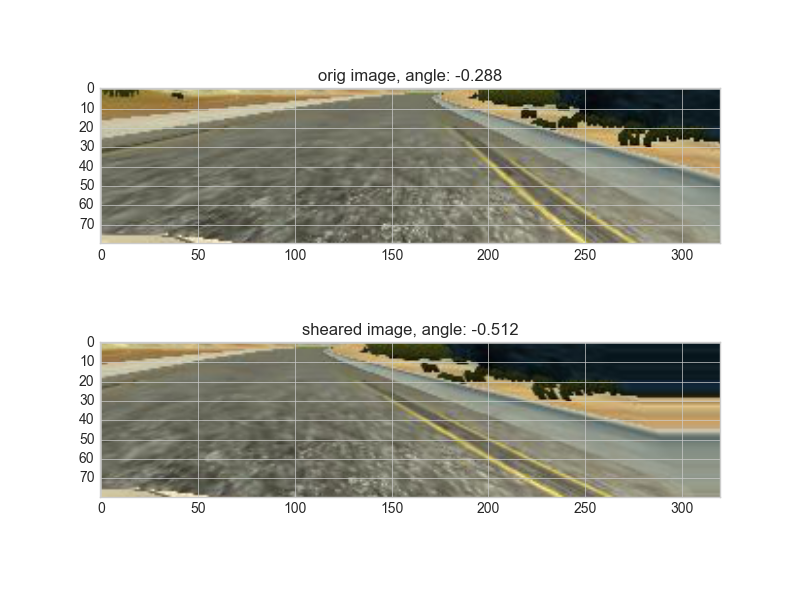
Then I randomly horizontally shear the image thinking that this would give more data with more variety of steering angle. here is an image that has then been randomly brightened:
Finally I split the udacity data and some extra data into training and validation data, and feed them into a generator function where random data augmentation will be applied and suppress the number of data with minor angle.
Then I trained the model with fit_generator and at eporch 14, I got a model which is able to complete both tracks without leaving the road.
Video for Track One:
Video for Track Two:
I would like to try online learning approach for this problem, which may be another possible to solve this problem.